Introduction
In today’s visual world, being able to take better photos is an essential skill. With the rise of social media and digital content, the ability to capture stunning shots has become increasingly valuable. Improving your photography skills offers a range of benefits, allowing you to effectively share and preserve meaningful moments.
Whether you’re documenting everyday life or showcasing your creative vision, enhancing your photo-taking abilities can significantly elevate the impact of your images.
By following this guide, you’ll not only refine your technical skills but also develop a keen eye for composition and storytelling through photography.

1. Take Better Photos With Your Smartphone Camera
Smartphone photography has become increasingly popular for everyday photography due to its convenience and accessibility. If you want to take better photos with your smartphone camera, here are some tips to help you master it:
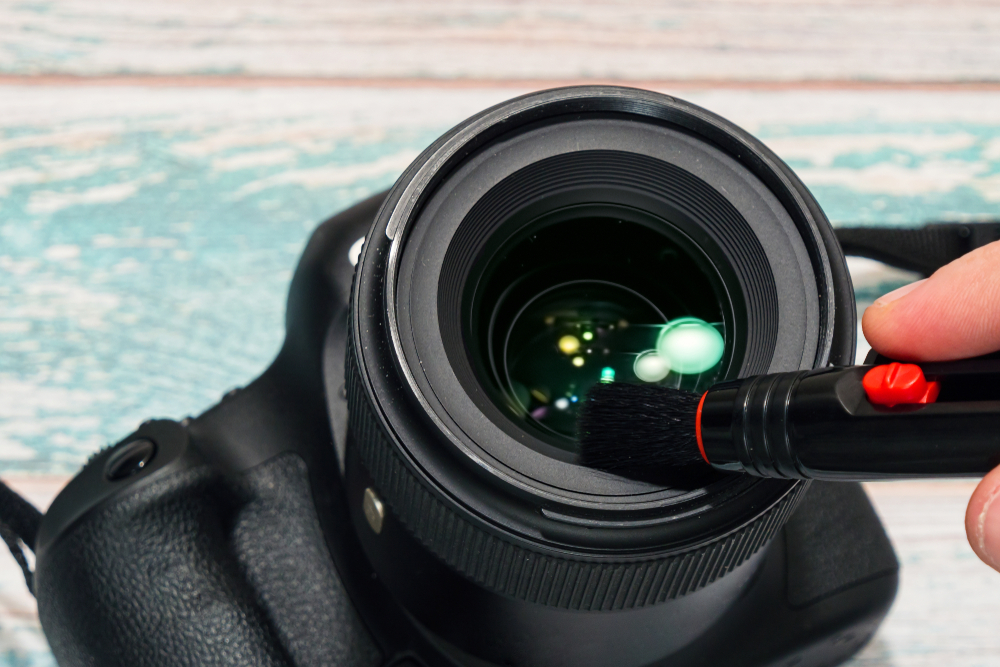
Clean Your phone’s Camera Lens
Before capturing any shots, it’s essential to clean your phone’s camera lens to ensure better image quality. Sometimes, dust or fingerprints can make your photos appear blurry or hazy. Simply wiping the lens with a clean, soft cloth can make a noticeable difference in the clarity of your images.
Utilize Natural Light Sources
Using natural light can significantly improve your photos, so try to avoid relying too much on the smartphone flash whenever possible. Natural light tends to be softer and more flattering, especially during the golden hour (the hour after sunrise or before sunset) when the sun is lower in the sky. Positioning yourself or your subject facing the light source can create a beautiful glow and enhance the details in your photos.
Consider Using a Tripod
Stability is key when it comes to photography, especially in low-light situations or when capturing long exposures. Holding your phone steady by hand can sometimes result in shaky images. Investing in a small tripod designed for smartphones can help eliminate camera shake and allow you to experiment with different angles and compositions. There are even flexible tripods that can be wrapped around objects for unique perspectives.
Adjust Exposure Settings
Adjusting exposure settings is crucial for achieving the desired photo outcome. The exposure refers to how bright or dark an image appears. Most smartphone cameras have an option to manually adjust the exposure before taking a photo. Here’s what you need to know:
- Increasing exposure can make a photo brighter, ideal for well-lit scenes or when you want to highlight details.
- Decreasing exposure can create a dramatic effect by making the photo darker, suitable for moody or silhouette shots.
- Finding the right balance is essential. Some scenes may require a higher exposure for the main subject, while others may benefit from a lower exposure to emphasize shadows or create a specific mood.
Example: When taking a landscape photo, adjusting the exposure can bring out the vibrant colors of the sunset, creating a breathtaking image.
Remember, mastering your smartphone camera involves understanding its features and experimenting with various settings to capture stunning shots.

2. Composing Captivating Shots
When it comes to phone photography, composition plays a crucial role in creating visually appealing photographs. By considering the placement and arrangement of elements within your frame, you can enhance the impact and engagement of your photos. Here are some tips for composing captivating shots:
Take multiple photos from different angles
Don’t settle for the first shot you take. Explore different perspectives by moving around your subject and trying out various angles. This will help you find unique viewpoints that can make your photos stand out. For example, instead of shooting a flower from eye level, try getting down low to capture it from ground level.
Utilize gridlines for better composition
Most smartphone cameras offer the option to display gridlines on the screen. These lines divide the frame into thirds horizontally and vertically, creating reference points that can guide you in placing your subject or aligning elements within the frame. This technique, known as the rule of thirds, can result in a more balanced and visually appealing composition.
“By using gridlines, you can place your subject at one of the intersection points or along one of the lines, which often leads to a more interesting composition.”
Harness light and reflections
Lighting is a key element in photography, and it can significantly impact the mood and atmosphere of your photos. Look for interesting sources of light, such as sunlight streaming through trees or reflections on water surfaces. These elements can add depth, texture, and visual interest to your images.
Compose photos using leading lines, symmetry, and negative space
- Leading lines are natural or man-made elements that draw the viewer’s eye into the photo. Examples include roads, fences, or rivers that create a sense of depth or guide the viewer’s gaze towards your subject.
- Symmetry can also create a sense of balance and harmony in your compositions.
- Additionally, negative space refers to areas in your photo that are intentionally left empty to provide breathing room and emphasize your subject.
Adjust focus by tapping the screen and stabilizing the phone for steady shots
- Most smartphone cameras allow you to tap on the screen to set the focus point. By tapping on your subject, you ensure that it’s sharp and in focus.
- Additionally, using a tripod or stabilizing your phone against a stable surface can help eliminate camera shake, especially when shooting in low light conditions or attempting macro photography.
By implementing these composition techniques and being mindful of lighting and focus, you can elevate your phone photography skills and create captivating shots. Remember to experiment and have fun with different compositions to discover your unique style and vision.

3. Understanding Light and Exposure
The importance of good lighting in photography cannot be overstated. It can make or break a photo, setting the mood and creating depth and dimension. When working with different lighting conditions, it’s essential to understand how to adapt and make the most of the available light.
Why Lighting Matters in Photography
Lighting is one of the most critical aspects of photography because it:
- Sets the mood: The right lighting can evoke emotions and convey a specific atmosphere in your photos.
- Adds depth and dimension: Properly lit subjects appear more three-dimensional, adding visual interest to your images.
- Highlights details: Light helps bring out textures, patterns, and small details that may otherwise go unnoticed.
- Creates contrast: The contrast between light and shadow adds drama and impact to your compositions.
Camera Settings for Proper Exposure
Key camera settings play a crucial role in achieving proper exposure. Understanding concepts such as aperture, shutter speed, and ISO is fundamental for capturing well-exposed photos in various environments. Each setting affects the amount of light that enters the camera, influencing the overall look and feel of the image.
Aperture
Aperture refers to the opening in your lens through which light passes. It is measured in f-stops, with smaller numbers indicating a larger opening (e.g., f/2.8) and larger numbers indicating a smaller opening (e.g., f/16). Here’s how aperture affects your photos:
- Wide aperture (smaller f-number): creates a shallow depth of field, with only your subject in focus and the background blurred.
- Narrow aperture (larger f-number): This increases the depth of field, keeping both your subject and background sharp.
Shutter Speed
Shutter speed determines how long your camera’s shutter remains open, exposing the image sensor to light. It is measured in fractions of a second (e.g., 1/1000, 1/250, 1/60). Here’s what you need to know about shutter speed:
- Fast shutter speed: freezes motion and is ideal for capturing action shots or preventing camera shake.
- Slow shutter speed: This allows more light into the camera and can create a motion blur effect or capture low-light scenes.
ISO
ISO measures the sensitivity of your camera’s image sensor to light. A lower ISO (e.g., ISO 100) is less sensitive to light, while a higher ISO (e.g., ISO 1600) is more sensitive. Consider the following when setting your ISO:
- Low ISO: Produces images with less noise/grain but requires more light.
- High ISO: This enables you to shoot in low-light situations but may introduce digital noise/grain.
By mastering the handling of light and exposure, you can elevate your photography skills and produce stunning shots in diverse scenarios.

4. How to Edit Your Photos Like a Pro
The role of post-processing in enhancing images while maintaining their authenticity can’t be overstated. Once you’ve captured a photo, the editing process allows you to fine-tune and elevate its visual impact.
There is a wide range of popular photo editing software options available, each with its own unique features and learning curves. For beginners, basic editing techniques such as adjusting brightness, contrast, and color saturation are good starting points. Experimenting with cropping and straightening can also dramatically improve the composition of your photos.
Remember, the goal of editing is to enhance the image while staying true to the original scene. As you progress in your photography journey, you can explore more advanced editing techniques like retouching, layering, and special effects, depending on your creative vision for each photo.
Taking Your Skills to the Next Level
The journey of mastering photography is a continuous process. As you develop your skills, it’s essential to seek further learning opportunities and continue practicing. Here are some suggestions to take your photography skills to the next level:
1. Advanced Photography Courses
Consider enrolling in advanced photography courses or workshops to expand your knowledge and practical skills. Look for courses that focus on specific genres, such as portrait photography, landscape photography, or macro photography.
2. Online Resources
Explore online platforms offering tutorials, webinars, and e-books on advanced photography techniques. Websites like CreativeLive, Udemy, and Skillshare provide a wide range of resources tailored for photographers at different skill levels.
3. Join Photography Communities
Engage with fellow photographers in online communities or local photography clubs. Sharing experiences, seeking feedback, and learning from others can significantly contribute to your growth as a photographer.
Remember, the path to becoming an accomplished photographer involves continuous learning, experimentation, and exploration of new techniques and styles. Embrace the process and remain open to new opportunities for improvement.

5. Building an Impressive Portfolio Online
Having an online photography portfolio is essential for both hobbyists and professionals. It not only allows you to showcase your work but also provides a platform to attract potential clients and opportunities. Here are some steps to set up an effective portfolio website that will help you display your photographs in a captivating manner:
1. Choose the Right Platform
Consider using website builders or platforms specifically designed for photographers, such as Squarespace, Wix, or WordPress. These platforms offer templates and features tailored to showcase visual content.
2. Select High-Quality Images
Carefully curate your best photographs to showcase your skills and style. Ensure that the images are high-resolution and properly optimized for web viewing.
3. Organize Your Portfolio
Create different categories or galleries to organize your photos based on themes, genres, or projects. This makes it easier for visitors to navigate through your work and find what they are looking for.
4. Craft a Compelling About Me Page
Share a brief bio that introduces yourself as a photographer, highlights your expertise, and explains your artistic vision. Including a photo of yourself adds a personal touch.
5. Provide Descriptions and Context
Accompany each photo with captions or descriptions that provide context, tell the story behind the image, or explain any special techniques used.
6. Optimize for Mobile Viewing
Ensure that your portfolio website is responsive and mobile-friendly, since many people browse the internet on their smartphones or tablets.
Conclusion
Taking better photos and improving your photography skills can lead to stunning shots that capture and convey memorable moments effectively. By applying the techniques and tips discussed in this step-by-step guide, you can enhance your photo-taking abilities and create visually appealing photographs.
Here are some final thoughts on the importance of photography and how to continue improving:
1. Practice makes perfect
Remember that practice is key to continued improvement in photography. Take every opportunity to go out and apply the techniques you’ve learned. The more you practice, the more comfortable and skilled you will become in capturing stunning shots.
2. Express yourself through photography
Photography is not just about taking photos; it is an art form that allows you to express yourself creatively. Use your camera as a tool to tell stories, evoke emotions, and share your unique perspective with the world.
As you continue on your photography journey, don’t be afraid to experiment with different techniques, explore new subjects, and learn from other photographers. Photography is a lifelong learning process, and there are always new skills to acquire and challenges to overcome.
Embrace the journey, have fun, and let your passion for photography shine through your stunning shots.
So grab your camera or smartphone, head out into the world, and start capturing those amazing moments. With dedication, practice, and a creative mindset, you have the power to take better photos and create stunning works of art.
Remember: It’s not just about the destination; it’s about the journey of self-expression through the lens of your camera. Happy shooting!


[…] In today’s fast-paced world, traveling has become an essential part of life. However, the notion that travel is expensive often deters many individuals from fulfilling their wanderlust dreams. Contrary to popular belief, there are numerous budget-friendly travel destinations waiting to be explored without denting your wallet. Our team has meticulously curated a list of top-notch destinations that offer unforgettable experiences without burning a hole in your pocket. […]
[…] Five Nights at Freddy’s, commonly abbreviated as FNaF, is a popular survival horror game developed by Scott Cawthon. Since its release, the game has garnered a massive following due to its unique gameplay mechanics, eerie atmosphere, and compelling storyline. Set in a fictional pizza restaurant called Freddy Fazbear’s Pizza, players assume the role of a night security guard who must survive five nights while being haunted by malfunctioning, murderous animatronic characters. […]
Your blog has become a source of guidance and support for me Your words have helped me through some of my toughest moments